Friday, June 21, 2013

Cream Cheese (Cookies and Cream) Cookies

Cream Cheese frosting is my arch nemesis. Like Batman and Joker, Superman and Lex Luthor, Thor and Loki….you get the idea. Unlike in the movies though cream cheese frosting normally wins. Spread that on a graham cracker and give me a glass of milk and I am in HEAVEN. Spread it all over a “blue velvet cake” (my husbands signature birthday cake for me) and well…you’ve never seen me happier. So when I figured out how to make a cookie out of a cream cheese frosting like base it was the best day of my life. Then I added in one of my favorite candy bars and it turned into one of my best creations. I think this could be one of those recipes that I go down in history for in my family. “No one made cookies like grandma’s cream cheese cookies and cream cookies” my grandkids will say.
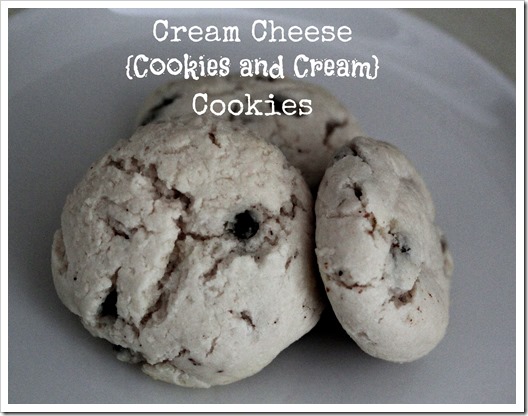
Cream Cheese {cookies and cream} Cookies (On Top O' Spaghetti)

Now before I age myself let’s get on to this recipe. While I type I might just eat one or five more of these.

Ingredients:
3 oz cream cheese
1 stick butter
1 1/2 cups powdered sugar
1 egg
1/2 tsp baking powder
1 3/4 cup flour
3 Hershey’s Cookies and Crème Bars Broken into Chunks

Cream together the butter and cream cheese. Add the powdered sugar and cream until well blended (this is the frosting like base for your cookies and what gives them the awesome cream cheese flavor) Add the rest of the ingredients and mix until they are doughy. Stick the dough in the refrigerator for 30 minutes. This is an important step! Don’t skip it no matter how tempted or impatient you are. If it helps just eat a spoonful of dough while you wait (I know raw eggs…naughty naughty…but YUMMY!)

Roll into one inch balls and slightly press down with a glass before baking. The cookies don’t spread much so press them down to the approximate thickness you want.

Bake at 375 for about 8-10 minutes until the cookies are just golden brown on the bottom.

Tips from Kj:

If you don’t have powdered sugar on hand…never fear!! I found out that you can put regular granulated sugar into your blender (at a 1:1 ratio to the powdered sugar needed) then you just blend away until a powder forms. This was so cool to try and it really does turn into perfectly powdery sugar!  :D Pin It

Wednesday, June 19, 2013

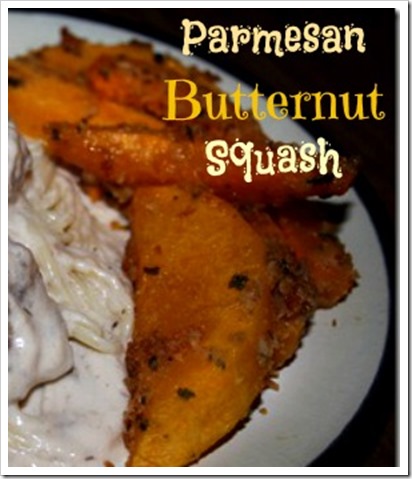
Parmesan Butternut Squash

My husband loves butternut squash like our baby loves….dogs, cars, cookies, coconut milk…and the list goes on and on. Pretty much he loves it maybe more than he loves me. He’d marry it if he could. Good thing he can’t or it might be banned from our home.

I love it too and come to find out so does our little guy. I guess butternut squash will have to be a permanent member of our family. Maybe like a second cousin or something. I like to have this with Swedish meatballs. (You can see them peeking in the picture) Tonight we had them with lasagna and it was a perfect accent to our dinner.

Parmesan Butternut Squash (On Top O' Spaghetti)
Here is what you need to make this beautifully delicious side dish for any meal. I promise you your taste buds will thank you. I literally had someone say “I don’t know what you did to this but I am glad you did it!” as he asked for seconds. Yum. O.

Pre-Heat oven to 400 degrees

Peel and dice 1 butternut squash into 2 inch strips, or cubes, or however you like it. Place in a baking dish.

Melt 1/4 Cup + 2 Tbsp butter in a small dish
Mix the following ingredients into the melted butter:
2 minced garlic cloves
1/3 cup Grated Parmesan Cheese
1/4 teaspoon salt
1/4 teaspoon pepper
1 teaspoon parsley

Pour the butter mixture all over the butternut squash and be sure to stir it up so it is all coated.

Bake at 400 degrees for 30-40 minutes or until the squash is perfectly soft and delicious.

Tips from Kj:

If you put your squash in a smaller baking dish and it is overlapping you will probably need to leave it in for the full 40 minutes. If the squash is in a single layer it will probably only take about 30 minutes.

I like a single layer better because everything is more evenly coated with the topping!

Pin It

Friday, June 14, 2013

Who Needs Pinterest? How to Separate an Egg White and Yolk the Easy Way

I was at my mom's house. She is pretty much the nicest mom in the world. Evidence:

She was making pancakes for my brother who is 16 at 11:30 when he should have been eating lunch or at least pouring himself a bowl of cereal or something. But alas he requested pancakes and she delivered. As she was making them she needed to separate the egg yolk and the white. I got excited and said "You should do the water bottle trick from pinterest!" She was like "Why?" And then did this:


It was epic. It cracked me up. And the best part about it was that it worked! haha She shook the yolk a little to get the white off and ta da a perfectly separated egg white and yolk.

This is one of the million reasons I love my mom. She is just awesome!

Pin It

Thursday, June 13, 2013

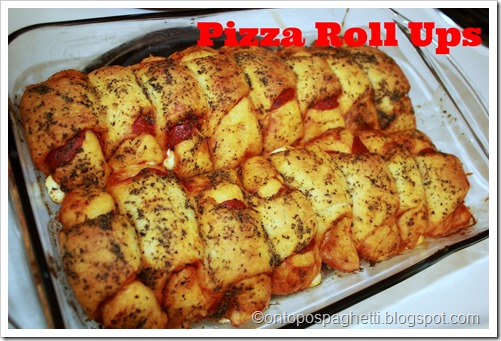
Pizza Roll Ups

My mom gave my little dude a fruit roll up the other day. He had no idea what to do with it. It was sticking to his fingers and his 4 adorable teeth just couldn’t seem to rip a piece off. He might have to try fruit roll ups again later if he ever gets any more teeth. If not he’ll just have to stick with pizza roll ups! ( He doesn’t really like sweet as much as savory anyway so he might be okay with this…he is my “husbands son” tear. I am determined to help him learn to love chocolate and peanut butter if it is the last thing I do! But that is another story)
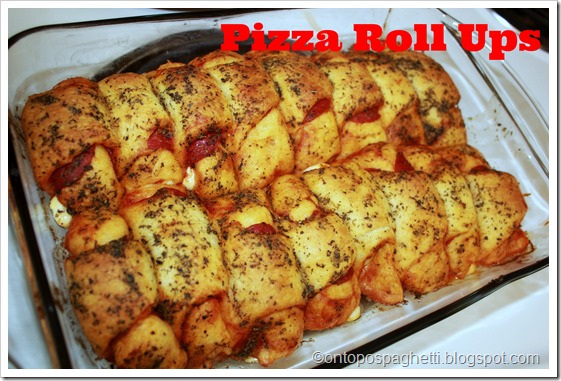
pizza roll ups
If you want a fast and easy dinner that everyone will love I would suggest these little pizza roll ups! They are so easy to make, everyone can personalize their own bites…and they are fun to make if you have little helpers in the kitchen. Right now my little helper plays with my pots and pans on the kitchen floor while I bake but soon he will be rolling up his own pizza creations! 

Here is what you need for your basic roll ups:

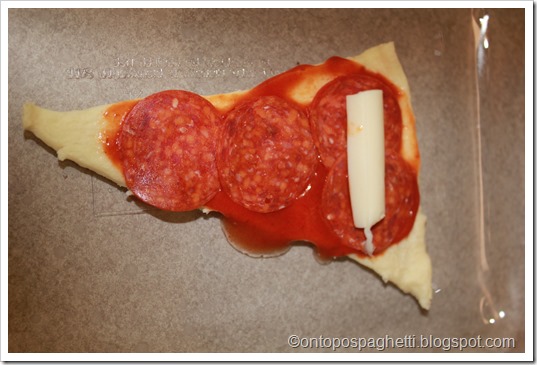
4 Mozzarella Cheese Sticks (Cut in half and in Half again so you have 4 smaller strips for each cheese stick…see pictures below if you are confused)
2 Crescent Roll Tubes
1 Package Pepperoni
1 Jar Pizza Sauce

Pre-heat your oven to 375

Unroll your crescent roll and spread some pizza sauce on it. Add your pepperoni and any other ingredients followed by your cheese. Roll from the wide end to the small end and place in your baking dish.

IMG_9069

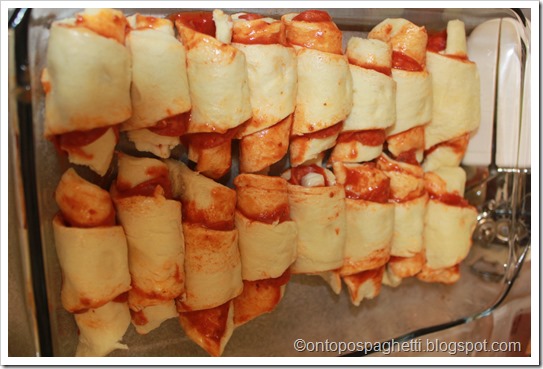
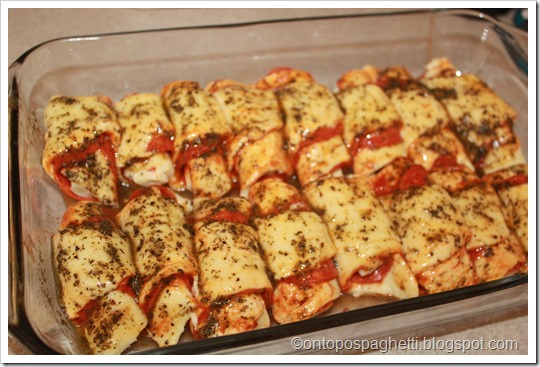
Continue until all of your pizza rolls are happy and smashed together.

IMG_9070

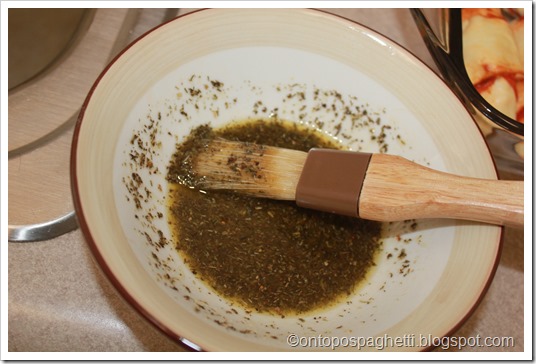
Then make your buttery delicious herb topping:

2 tbsp butter melted
¾ tsp dill weed
¾ tsp dried basil
1/4 tsp garlic salt

Mix everything in with the melted butter and then spread it all over the rolls.

IMG_9085

  IMG_9086

Bake at 375 for about 20 minutes or until the dough is golden and cooked through.

pizza roll ups

Tips from Kj:

Add parmesan cheese to your butter topping. We were out but I love putting this topping on any and every kind of roll I make. It adds an extra pop of flavor to every bite!

The sky is the limit with your filling options. Think of your favorite pizza and put it in your roll! Pin It

Tuesday, June 4, 2013

My Mama’s Sweet Corn on the Cob

(or that is what I would call it if I was from the South?)

Today I took my baby boy swimming for the second day in a row. He is my little fish. He likes to sit on the edge of the pool and lunge into my arms with a huge grin on his face. He is so cute. I love summer. One of my favorite parts of summer is going to the store and seeing corn on the cob that is like 10 for a dollar. Okay not really but it is cheap! I love it. And this recipe is easy and delicious and comes from my awesome mom. I watched her make corn like this for years and years and I think it will always be my favorite way to have it.  

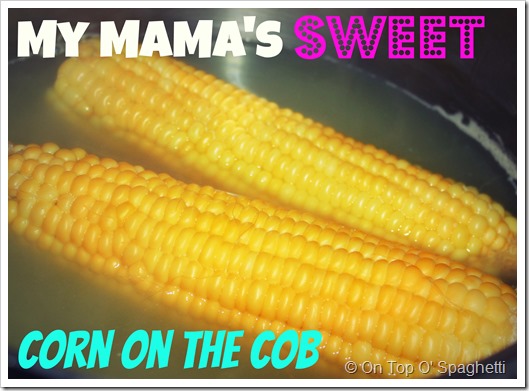
corn on the cob

I am telling you this corn on the cob is to die for. I love it. I could eat 3 or 4 or all of them at dinner. I’d let everyone else eat the steak and salad and potatoes and just eat the corn. That is if they would let me…but pretty much this is a selfish recipe. Because you will want to keep yours all to yourself! This recipe is also great if you like to cut your corn off the cob and then eat it. Still Awesome.

Get a big pot of water-big enough for however much corn you are boiling.
Add about 1/4 cup milk. Add a small handful (about 1/4 cup of sugar). That’s right…stick your *clean hand in the sugar and just grab it and drop it into the pan! Then add your corn and boil. I like to watch the corn…when it changes from light yellow to a very sunshiny happy yellow it is ready!  (To me this takes about 6-8 minutes)

Tips from KJ:

I like to just turn the burner off and let the corn soak in the water getting yummy and sweet for a minute or two after it finishes boiling. 

This corn is so good it doesn’t even need anything on it! But if you have to know salt and butter are my favorite things to put on corn on the cob…yum! Pin It